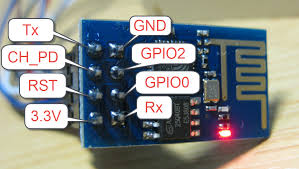
For flashing firmware you need connect GPIO0 to GND and CH_PD to VCC
I have this TTL converter
Bus 003 Device 026: ID 067b:2303 Prolific Technology, Inc. PL2303 Serial Port
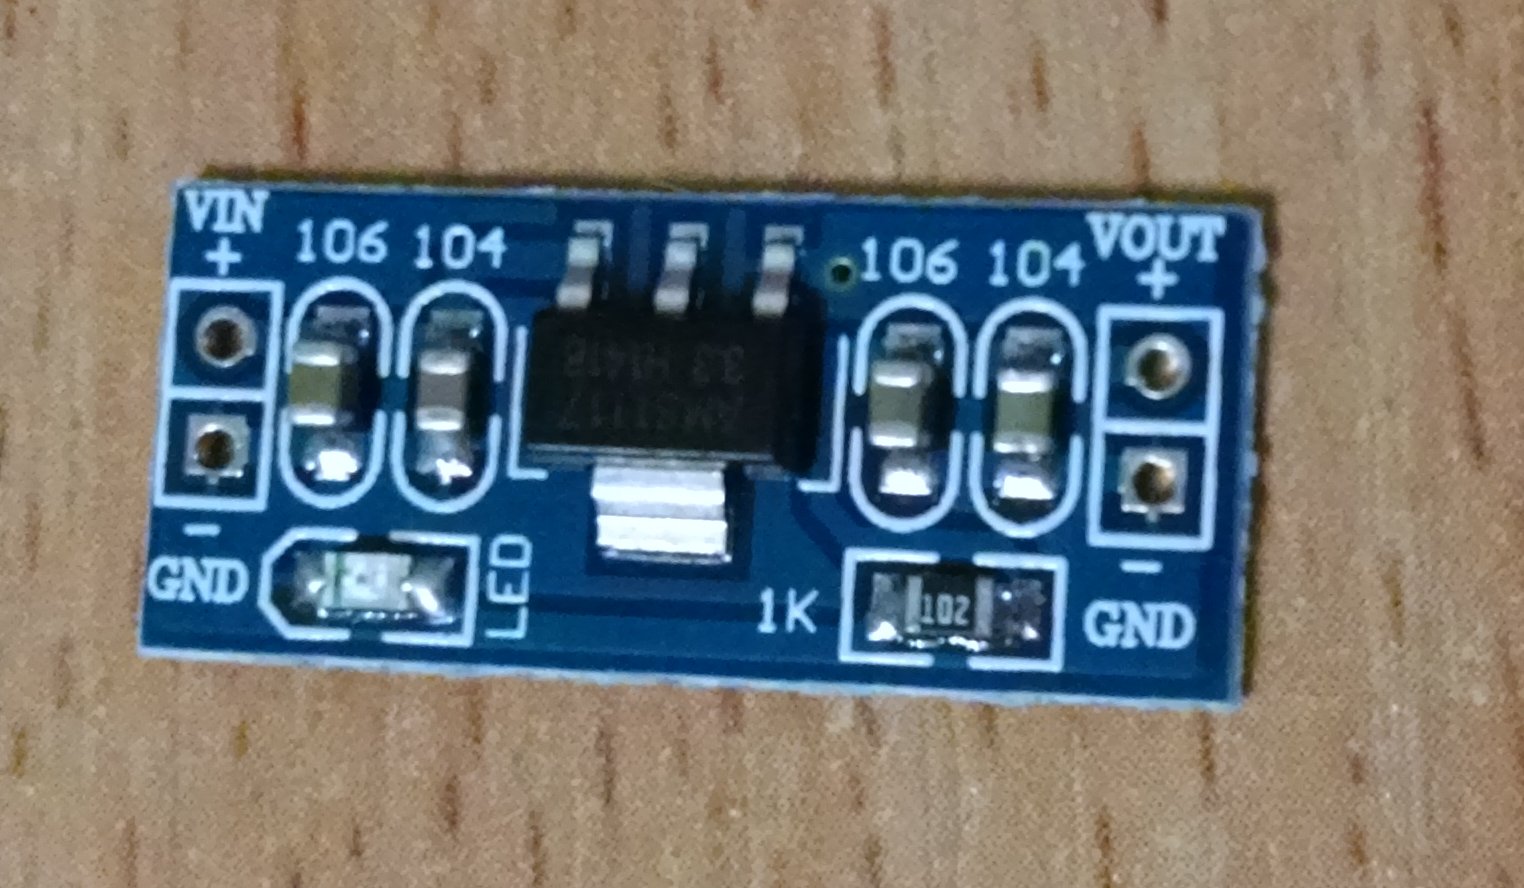
But they have 5v output, so i used 5v to 3.3v converter
Prepare notebook for flashing
Go to https://github.com/themadinventor/esptool
and download esptool
wget https://github.com/themadinventor/esptool/archive/master.zip
install Python pip
apt-get -y install python-pip
Inzip our master.zip
unzip esptool-master.zip
Run installing dependency
python setup.py install